Thursday, December 31

35 Tips to keep ice longer in your esky, icebox, cooler or chilly bin when camping.

On the 29/12/2015 a member of the Facebook group: Around the Campfire asked this question.

'Hi, Wanting to know the best way to keep ice in the esky for a longer period of time. Many thanks'.

The response from the group of 25,000 odd people was amazing, there were loads of great tips from experienced campers. You will notice that some tips conflict with other tips, and do not agree with the article we've written on 'How to get the most from your icebox! Get the maximum performance!'
Waeco Cool-Ice 55L icebox WCI-55
The Waeco Cool-Ice WCI-55 Icebox is one of the most popular sizes at Tentworld.
** Note:  Many Australians refer to all iceboxes,  chilly bins and coolers as Eskys.

Esky is a brand of cooler, and generally they do not have much, if any insulation inside them.  They are more suited to parties than for camping trips.

For a camping trip, we recommend a good icebox (known as Chilly Bins to those from NZ)
  1. A good icebox will last twice as long as an esky.
  2. From experience: freeze ice cream containers full of water to make block ice. You can also bust up a some block ice to go on top.  Sprinkle with a little salt. Also, make sure everything you put in the esky is cold before hand. Not warm. Lasts much longer.
  3. Put a handful of salt in the blocks. Stay colder and take longer to melt. The day before, put everything thats going in the esky in the fridge or freezer, also put a couple of spare blocks of ice in the esky. Then leave loading the esky up till the last minute. The esky is always the last thing to go in my car.
  4. Sprinkle salt over the ice or try and get hold of some dry ice.
  5. A good quality esky and block ice also pre cool the esky overnight
  6. Freeze 2 litre milk bottles with water and stand them amongst your food They take a lot longer to melt than ice cubes - if you dont put salt in as people are suggesting you can use it for drinking water.
  7. You can always buy a bag of ice somewhere and top it up every couple of days.
  8. Bottles of ice should last 3 days if its kept out of the sun and in a cool spot.
  9. We place one cube of block ice in the middle of the esky with what ever you need placed around it then cover in normal ice, have even gone to the extent of wrapping a blanket around the esky to keep the heat away...good luck
  10. I found that using old wine cask bladders works well. They seem to insulate well and don't melt fast. Then you have nice cold water to drink too...as long as you wash the bladder out first! I used to half fill them and freeze them flat so they sat neatly at the bottom or up the sides of the esky.
  11. Salt
  12. Make sure you keep in a cool spot, dont open it unless necessary. Use block ice on bottom. Make sure fit is a GOOD quality esky not woolworths junk, boat eskies (iceboxes) are usually the best (thick insulation)
  13. Freeze some big blocks like they say and then get crushed ice.
  14. Freeze water bottles. They pack in neatly and you can drink them after. Mine last approx 2-3 days. Milk bottles with salt also.
  15. Use block ice.
  16. Dont open it as often.
  17. Don't use salt, as having this water in an emergency for drinking can be useful.
  18. If you are using crushed ice, I usually buy a couple of days before and freeze them properly at home because half the time they are melting before you put it in the esky.
  19. We use empty milk containers with salt and water and freeze. Then put your item in your esky and add ice. We also take a 25litre water container and top it up with a block of ice so we have plenty of drinking water that isn't in our esky. The salt water in the water containers we have had ice in our esky for 5-7days.
  20. Block ice lasts much longer than crushed. I hate water all through the esky contents so i prefer ice in a bottle or icecream container etc. I also freeze meat etc before hand and have other contents cold before they go in.
  21. We have never used salt but also never had an issue. Certainly get frozen blocks but also a Hessian bag soaked in water is good to put on top of everything in the esky as keeps it cool as well.
  22. Chuck the esky away, and get an old fridge rip the motor and guts out of it. And use that.. Eskys are no good.. not insulated like fridges.. the ice in my fridge esky is good for 4 to 5 days... just do it you wont look back...!
  23. If you're using block ice open the bung enough so that any melted ice/water drips out . Theres no point trying to keep melted water cold unless your going to drink it. Another bonus is your food wont be swimming!
  24. Buy an actual icebox for meat etc and open twice a day, mine lasts 4 days.
  25. We use to freeze the kids popper drinks and line the bottom and sides of the esky and put everything in the middle then put more frozen poppers on top. ..now we have iceboxes. ..best investment ever..
  26. Forget the salt..it makes the scotch taste bad ...put a wet towel on top.... you can also keep the towel wet by placing a bucket of water on top of the towel and either put a small hole in the bucket or place one end of a tea towel in the bucket and let gravity siphon it out...
  27. We used get block dry ice wrap newspaper round it then pour ice lasted over a week
  28. Put the wet towel on top of the esky and keep wet. Air flowing over the wet towel reduces the actual temp. In the old days food was hung in a canvas device, and kept wet for just this reason. Coolgardie safe was the name.
  29. Trust me on that wet towel trick.... I spent a week near Bourke one summer.... 1 bag of servo bought ice.... i use it on my 12v fridge as well...it doesn't turn on as much
  30. I just run an Engel 12v fridge now so no more soggy snags!. I still take an esky occasionally. Just for beer....only beer... nothing else but beer....mmmmm beer!
  31. If you can get a hold of some foam boxes from Butcher or fish shops use these to cover your esky. Especially the lid, this will help.
  32. I place block ice across the whole bottom of the esky then place a wire mesh shelf across the top.  I then put my food etc on this, and then cover in ice again.  I usually use 2 litre ice cream containers for holding the ice.
  33. We freeze up old 2ltr Tomato sauce and cordial bottles and line the ice box walls and bottom with it then a towel on the bottom stock stuff and pour bag ice over it.
  34. We also take an esky for just drinks, one for food and have the Engel on freeze for our meat.
  35. Clip seal sandwich bags, freeze them one week before u go away, mine last up to 6 days, when you buy bag ice dont open it just put the bag in it will last a lot longer.
I hope you enjoyed these tips from the Around the Campfire community group.

 If you're still looking for more tips on how to get ice to last as long as possible. Make sure you check out our article: 'How to get the most from your icebox! Get the maximum performance!'

Do you have more tips on how to keep ice longer whilst camping? Make sure you drop them in the comments below! Happy Camping! :)

Wednesday, December 30

Are you Prepared for Storm Season?

Mother nature can strike at anytime of year quickly, unexpectedly, unpredictably and with great ferocity at times which can cause severe damage, flooding, road closures, isolation, disruption to utility services (water, electricity, gas & sewerage), injury and in extreme cases even loss of life. These effects can be localised to a single suburb or a town however can be as widespread as covering entire regions in severe storm events.


Over the Christmas period this year large sections of northern Australia and Queensland have been hit by severe storms causing damage, power outages and emotional strain. Our thoughts go out to our fellow Australians at this time and we wish them a swift recovery. Unfortunately these events are often something we see on the news and think it will never happen to us, until it does. There are, however, steps we can take to help prepare us for these situations to make our circumstances better should we ever have to experience such an event. Better safe than sorry, so they say. 

Monday, November 30

Cobb & Co Nine Mile Campground, Sunshine Coast, Queensland Review

Cobb & Co Nine Mile Campgrounds - just 2 hrs from Brisbane.
Cobb & Co Nine Mile Campground is approximately 2 hour’s drive from the Brisbane Tentworld camping store or just one hour from the Tentworld Sunshine Coast store
That is, if you don’t have an argument with your GPS about the best path.
  GPS says, follow the Bruce Highway north, all the way to Kybong, turn right onto Tandur Road and follow this until you turn onto Noosa Road.  Noosa Road is a good quality gravel road which takes you straight to the campground.  Only about 15 minutes off the highway.  I still stand by my thinking that turning off at Pomona and weaving through this beautiful coastal agricultural area is a far better path.  This does involve a little more gravel, a couple of beautiful creeks and cute bridge crossings and a tiny hill climb but road quality is top notch.  Least of all, I cannot possibly exaggerate the quality of the sausage rolls at the Pomona Bakery if you have time.  My advice is beware of following directions from your GPS.  They are such kill joys.


Driving from Pomona to campground


Driving from Pomona to campground

The campground entry is very well signed and also home to a camp oven big enough to cook a meal for a 100 hungry campers. You cannot miss it. From the gate your eye is treated to 50 acres of beautifully cared for bushland property. Plenty of room for a large family tent! On the far end of the property is a mighty sweet creek and a very inviting billabong. Yes, you can camp beside it. How good is that? There are a couple of small dams on the property which make ideal sites if you are seeking more privacy, away from the many families and 4wd drive groups that have already discovered this terrific gem. There are toilets, showers, camp kitchen and a huge camp kitchen/shelter for group happy hour. They do have some glamping tents, which I noted are all on skids. I assume they can be moved around as is required, so non-traditional campers can enjoy this great spot with their traditional camping family members and friends.


Front entry to the campground
 

Front entry to campground


The staff were a true delight and why wouldn’t you be when you work in a gorgeous place steeped in history. This great spot was once home to Cobb & Co horse change stables. The management has done a fabulous job of maintaining the exhibits and the nostalgia. You can see all of this at the check-in desk. Please make some time to peruse, read about some of the characters who lived in the region in times gone by and take a heap of photos.


Check-in at the Coachhouse
Once all checked in and set-up, you and the family can take a look around the animal farm, jump on your pushies, the flying fox, take a bush walk or go for a swim or canoe in the billabong.  If you want to explore, you can jump in your car and take a scenic drive of the region.  Enjoy a beer or ice-cream at Boreen Point.  Find one of the fabulous 4by tracks in the state forest or drive the many gravel rounds that weave through this lovely area.  You are less than 50 minutes to Tewantin if you fancy a beach drive or a swim on the beach at Noosa.  If you don’t mind heights and weaving your way up a steep, narrow, gravel mountain road, a drive to Cooran to James McKane Memorial Lookout is a real treat.  Or you can just sit under a tree and stare at it.  This works for me.

Anyone for a chook hug?


Perfect for children and pushbikes


Great to see the children riding all over this area and its many obstacles


Perfect for a swim or canoe


Billabong

Whatever you do… if you have children, ensure you are back in time for the afternoon horse and buggy ride or you may not be forgiven.


Afternoon horse and buggy rides

There are no powered sites at the campground but that should not bother you. You will not be short on things to do. Once you get your campfire going and get to some serious marshmallow roasting, you will want for nothing. Except, maybe some Bushman’s if you are camped near the billabong.


I might need to find more happy hour friends


Nothing beats a campfire

There are showers near the check-in area and toilets are spotted throughout the campground, so you can leave your portable toilet at home.. This campground is also pet friendly. There is absolutely nothing lacking at this magnificent family campground and you are not going to believe it, but it is only $12 per night/per adult.


Showers that may second has stables
It has been a long time since I have been this impressed with a family campground.  I can’t wait to go back.  I strongly suggest you make time to visit this spot before everyone reads this feature and it gets too crowded.


Small dam at front of the property

What a fabulous area for a small group of friends.  Plenty of room to pitch a tent!

So much room to camp.  Check out how small that Coleman Event 14 looks!

Portable glamping

Monday, November 9

5 reasons to put a tarp over your tent and a few reasons why you shouldn't.

If you head to any camp ground in Australia,  you're likely to see at least a few campers setup with their tents underneath a tarp set-up.

There are a few good reasons why putting a tarp over your tent is a good idea.

1)  Protects your tent from UV Rays.  Tents, like any material will slowly be damaged by UV rays.  When possible, it is definitely a good idea to put a tarp over your tent to protect from UV rays, therefore extending the life of your tent.

2)  Protects your tent from bird & bat droppings.  This is mostly for asthetics, but sometimes bird and bat droppings can also damage the materials on your tent depending on the acidity in their droppings.  Either way,  its not nice to have your new tent covered in droppings as it's not that easy to clean either.  Especially without damaging the water proofing agents in your tent.

3)  Reduce the chance of condensation.   Modern tents are all designed to be fully waterproof,  so placing a tarp over your tent to make it waterproof is not really necessary.  However,  all tents can be susceptible to condensation.  Putting a tarp over your tent can help reduce this risk.

4)  Keeps dew off your tent.  In humid areas there can often be a lot of dew in the mornings.  If you're planning on packing up early you might not have time for the dew to dry off your tent.

5)  Creating a covered area that incorporates your bedroom.  If you spend a lot of time in your tent during the day and want it to be nearby your kitchen.  Covering at least the entry way of your tent with your tarp setup could be a good idea.  This way if it's raining heavily you will not have to run through the rain to get to the kitchen.

TIP!  Before you go camping make sure you set your tent up and weather (soak) it to check for any leaks.  If you do find a small areas that are leaking,  address it with some seam sealer such as McNett Gear Aid Seam Grip and pack a wax stick with you to patch any small leaks you may discover.

When should you consider not using a tarp over your tent?
1)  Overnight camps -  Putting your tarp over a tent is not such a great idea when you're staying somewhere overnight.

Spending additional time to put a tarp over your tent for an overnight stay is time that could be better spent enjoying yourself, exploring the local area or just having a beer!

Reduce your setup time and maximise your relaxation time!

2)  Keep your tarp setup smaller.  Large tarp setups can be dear and the most benefit from having a tarp setup is a great place to spend outside but protected from the elements.

I hope you found this article useful.  If you're considering putting a tarp under your tent find out why I think it's a great idea here.  Visit 4 reasons why using a tarp under your tent is essential.

If you have anything else you'd like to see added to this article please let us know in the comments! Happy Camping!

Monday, November 2

Camping at Lennox Head, NSW


I headed to Lennox Head, NSW on the weekend.   Lennox is only 2 hours south of Brisbane and 1 hour from the Gold Coast. Lennox Head is surrounded by some of the most beautiful national parks and rainforests you will ever see if you ever want to explore this coastal region further.


Seven Mile Beach, Lennox Head, NSW


We booked into the North Coast Holiday Park.  The park staff was both friendly and helpful.  There is a choice of cabins, tent or caravan sites.  The park is immaculate and has all the basic tourist park necessities i.e.  BBQ’s, camp kitchen, dump point.  It does lack a playground and swimming pool though and sadly, it is not pet friendly.
Lake Ainsworth in the background

North Coast Holiday Park, Lennox Heads, NSW

My favourite thing about this park is how perfectly situated it is to everything.  It is only a short walk to the main street of Lennox Head.  Ideal if you fancy brunch in one of the busy coffee shops.  The surf club is directly across the road.  I’m also told the bowls club is a great feed if you need a night away from the kitchen.  All within easy walking distance.

I didn’t see a lot of children in the park but maybe they were all at Lake Ainsworth Recreation Area, which is a tea-tree stained dunal lake right beside the holiday park.   This lovely, well grassed recreation area has barbecues, picnic tables and a couple of blocks of toilets very close by.  It is perfect for swimming, stand-up paddle boarding, kayaking or canoeing.  Ideal for children as there are lots of shallow areas and no motorised water sport is allowed in this protected lagoon.

Lake Ainsworth
Lake Ainsworth
To the front of the holiday park is Seven Mile Beach which is a renowned surf beach.   It was super busy on the beach with all the little surfers having a club day and many bigger surfers enjoying some waves.
Seven Mile Beach

Seven Mile Beach
A lovely weekend was had by all and both this holiday park and region come with glowing recommendations from me.  Definitely one of my favourite spots as it is just that little bit away from the hustle and bustle of Byron Bay and the Gold Coast.


Monday, October 19

Coleman Gold Series Instant Up Tent Maiden Voyage Review

By Jo Kopelke of Camping Queensland.

I took my new COLEMAN GOLD SERIES INSTANT UP for its maiden journey on the weekend.
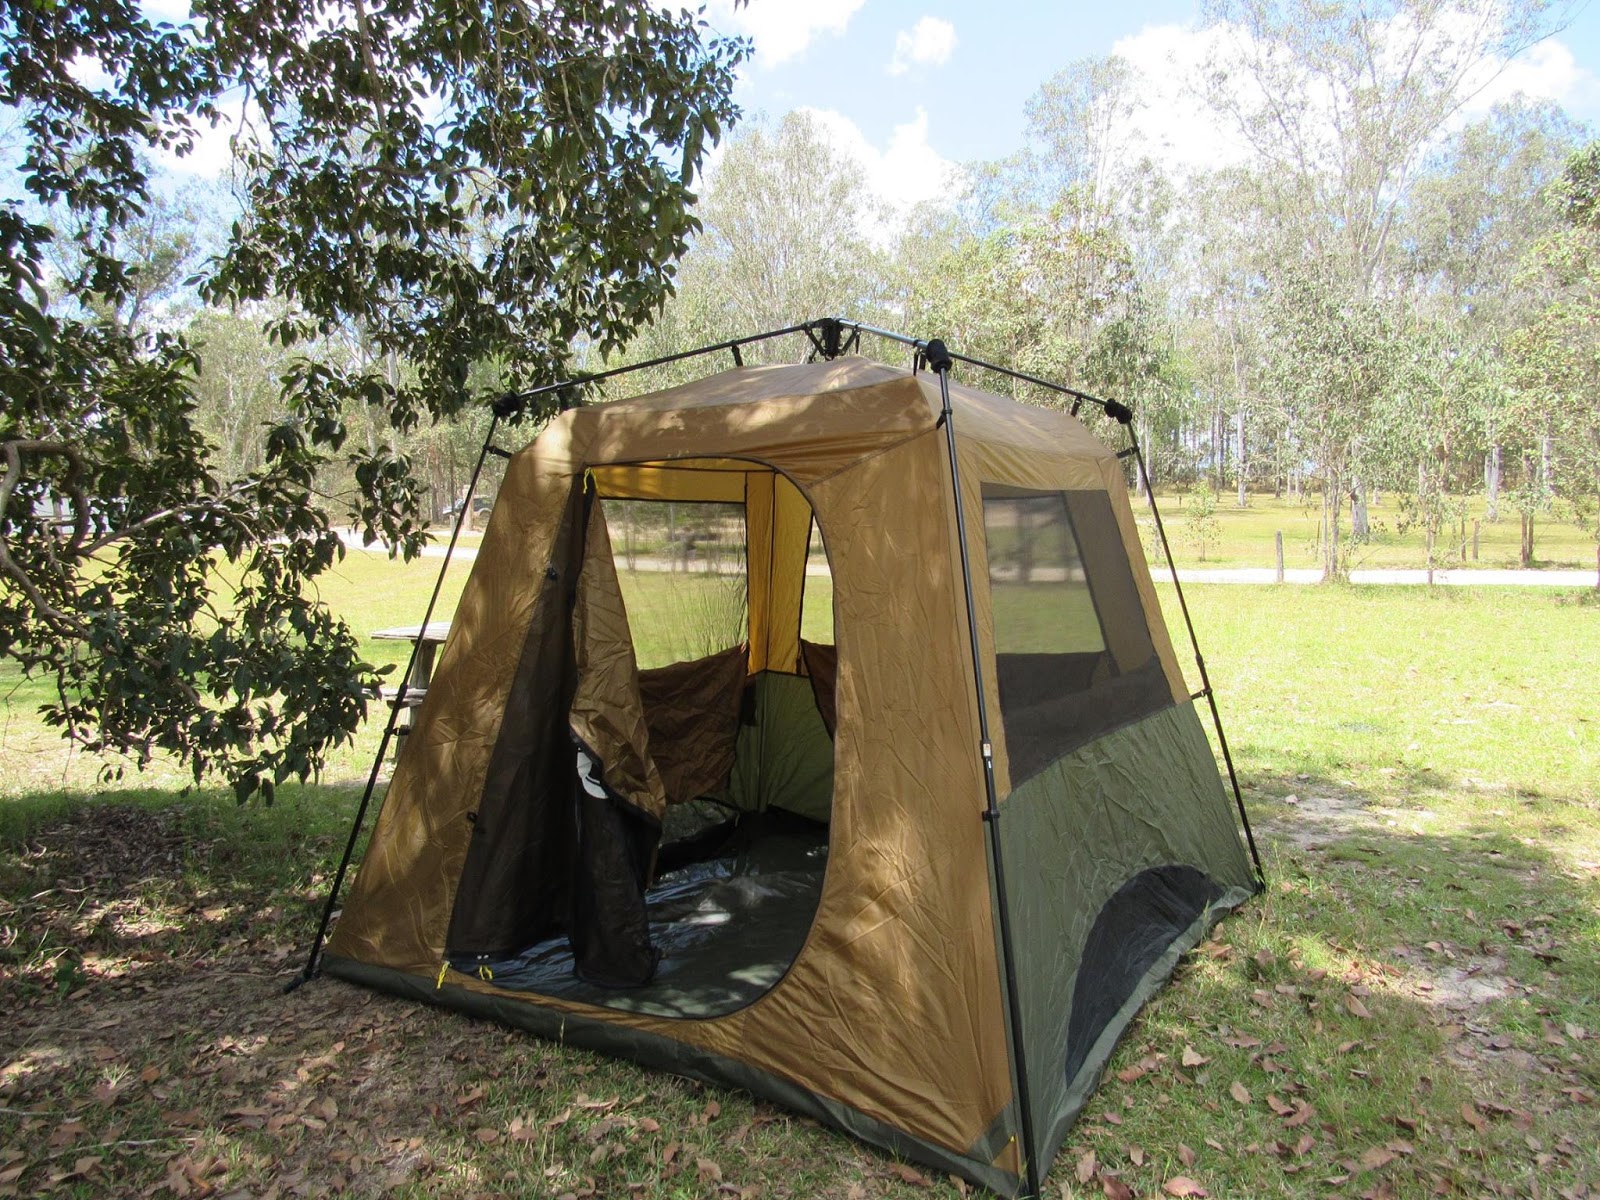
My new Coleman Gold Instant Up 4 tent in the wild.
Very impressed with the new heavy duty polyoxford PVC flooring. Feels nice underfoot. There was a fair amount of dew around this morning. I was expecting it to need some sun. Alas, not so much as drop of condensation inside or moisture underneath at pack up. I usually find drying off tents the most time consuming part of packing up after camping. This was a breeze this morning.
Pitching my new Coleman Gold Instant Up 4 Tent
With all the new features, my very favourite is the thicker and heavier fabric used in the fly. It was so much darker inside. So much so, I slept till 7.30am. I could get used to that.

The instructions say it requires 2 people to erect. I disagree. 


I always put my old model up by myself. 


This model is fundamentally same design. But in saying that, the thicker, heavier fly fabric makes it a little harder to use the wind to pull the fly over the top. The Instant Ups are quite tall and dragging a fly over the peak is a chore if you don’t have someone to hold the far side in place. I struggled with this for about 3 mins. Walked around it twice, then decided to drop the 4 corners back down and put the fly on whilst it was down. I then erected it again and it was easy as. Done. You can easily have this tent up in 2 mins by yourself, if you remember this tip.

The Coleman Gold Instant Up 4 tent inner fully pitched,  hold this space!  It goes down again in a moment.
Lowering the framing on the Coleman instant up 4 gold tent makes it easier to get the fly over on your own.
The only complaint I ever had with the standard Coleman Instant Up 4 model was no lower level ventilation. The new model has 2 extra air flows, plus the front door. Perfect for those sultry summer nights when every bit of air is precious.

The carry bag on the Coleman Gold Instant Up 4 tent is heavy duty, and very large making pack up easy. 
The flys now been thrown over my instant gold 4 tent, now just need to peg it out!
Pegged out!  Just about time to relax,  just the guy ropes to go.
The other bonus is the heavy duty carry bag. It is huge. I was able to lay the fly on the ground, place the inner on top of that. Roll it all up and throw it in the bag. I didn't even have to push little bits into corners; whilst attempting to pull the zipper. Nothing worse than taking longer to put a tent back in a bag, then it took to erect and pull down combined.
Drove away from camping feeling pretty pleased with my new purchase 
smile emoticon
I chose the Coleman Gold Series Instant Up 4 but they are also available in 6 person & 10 person.
*Coleman Gold Series Instant Up design - sets up in under two minutes
*Front door can be pitched out as front awning with two poles (included)
*Detachable oversized 3 pole (included) awning which can be attached to both left and right sides (so you can follow the shade)
*Coleman Circle Ventilation for added air flow
*Integrated internal storage hammock and organisers
*Power cord management system
*Convenient welcome mat to help keep tent clean and dry inside
*Heavy duty carry bag
Fabric:
75D/ 185D Polyester rip-stop inner
3000mm PU fly
Heavy Duty Polyoxford PVC flooring
Frame: Steel (includes 5 awning poles)
Weight: 12.7kg
Size: 240w x 240l x 190h cm
Side shot of my Coleman Gold Instant Up 4


Friday, October 2

Why do I get condensation in my tent? How do I avoid it?


Condensation is a problem most campers will experience to some extent in their camping life.  But often it can be avoided!

In this article I hope to explain simply,  why condensation occurs and then how to avoid it.

The first time you experience condensation inside your tent,  the natural reaction is to think that it's leaking and possible faulty.  After all,  there are many litres of water inside my tent?

Usually,  this is not leaking at all but is condensation.

The simplest way to test if that is the case is to set your tent up at home, and thoroughly water it with your garden hose.   For hours if you like.

I recommend doing this prior to taking your new tent camping.  This if you get wet you know it was condensation, and can plan to solve it the next night.

Sometimes,  during this process you might find your tent is leaking slightly from a stitching point.  This is normal to solve this the easiest way is to use some McNett Gear Aid Seam Grip Seam sealer.
Setting up your tent at home for the first time is a great way to familiarise yourself with your new tent.  Setting it up at home also means that if you need to you can deal with any problems you may find with the tent prior to heading on holidays.  Just make sure you pack away everything back in to the bag!

It also means you can set your tent up at the camp ground like a boss! Making even the most inexperienced camper look like a veteran!

I DO HAVE GOOD NEWS!  Condensation can be mostly avoided,  if you just take these simple precautions:

Never close all of your tent windows.   Keep as many open as possible at all times.  To avoid condensation,  you want to try have the inside air temperature the same as outside.

Any good Australian tent will offer loads of ventilation options that can be used in all weather conditions.

Please remember,  tents are not designed to help you stay warm, but they are designed to protect you from the wind, rain, insects and to provide you with privacy.  To stay warm, the best thing is a good hooded sleeping bag,  thermal underwear and maybe a beanie.

I hope this post helps you understand how to best use your tent, and avoid condensation!


Wednesday, August 26

A few simple camping tips to make your next outdoor adventure easier

A few simple camping tips to make your next outdoor adventure a blast!

Each time before we go camping I find myself looking up tips and or ideas online so I thought I would put a few of my favourite tip finds together. 

Tip one - Add Sage to your fire to scare away mosquitoes and other bugs then climb under your mosquito net before bed


Sage can be found growing in many Australian backyards.  It's good to cook with, and to burn!
Mosquitoes and other insects can be a pain when camping and can really upset the mood.  On a recent camping trip we stayed in a beautiful private spot, which had lovely trees and a gorgeous river, which of course meant thousands of mosquitoes.  They were so bad that the minute they could get through the bug spray they would and unfortunately the face was not off limits.

This was a real problem for us as I have a son who reacts quite badly to bites and a baby daughter who sucks her thumb - I of course didn't want her eating the bug spray.   When we got back I did some research on some natural remedies and came across this one.  I love the idea of this and look forward to trying it on our next trip just hope its not too smelly.  If I end up going away with my extended family,  I might try it in their Ozpig too!

Tip two - Set up a hand washing station using a water drum with a tap and attach paper towel with a bungee cord on top

As I mentioned above we have two young children and are constantly needing to wash hands and/or faces.  This tip is so useful and makes it unbelievably easy to clean up.  It also shows the kids where to go to wash their hands so there is no excuses and there is no longer a need to be scratching around trying to find a towel to dry your on.

Tip three - Keep your toilet paper clean by using an old plastic container as a toilet roll dispenser to keep near your portable toilet by making a vertical cut out in the plastic and threading the toilet paper through


This is another tip I read and now can't imagine doing it any other way.  It is so simple, costs nothing and yet is so effective.  No more having to worry about where to put the toilet paper
when using a portable toilet where the grass can often be damp from overnight dew.

Tip 4 - Tick repellent - 1 part Tea Tree Oil, two parts water then spray on shoes and socks

I am not sure why this tip works but it does.  Very useful when camping in a tick prone area.  In fact Tea Tree Oil is pretty useful.  It will also get the tick to unlatch if you place a drop directly onto the tick.

Tip 5 - When packing up wrap shoes in a shower cap to prevent them from putting mud on your other clothes


I always struggle with dirty shoes and packing.  They ruin your clothes and make the washing so much harder when you get home, however since I heard of this tip it has not been a problem. I never realised how useful a shower cap could be.

Tip 6 - Use foam floor tiles for a softer more comfortable tent floor


This is another tip I learned and now couldn't do without.  I love having the softer floors and it acts as an extra layer for warmth.  They are also easy to pull out and clean.  If needed they can be pulled out the tent and become a great play mat for the kids.

I hope these tips help you as much as they have helped me.


Friday, October 17

Q&A: Why does my air compressor take so long to pump the bed?


Q:  I've got a great tyre compressor, but it takes FOREVER to pump up my air bed.  WHY!?

Rarely a camping trip goes by when I'm not setting up at the camp site and hear someone running their car tyre compressor trying to pump up their velour air beds.

I hear them going and going throughout the afternoon, and wonder if anyone had told them when they bought the air bed that an air compressor would not do the job very well at all?

Most of the time I'm not able to help, as I sleep on a self inflating mattress.  They don't require pumps.

However,  sometimes I will take one to inflate tubes for the boat.  When I do, I always take it over to lend to them.  It just makes such a difference,  turning a 2 hour job to 5 minutes.  Usually,  the person pumping the bed had no idea that a high volume pump was available!

The OZtrail Velour Queen Double Height Air Mattress is a great compact bedding solution, but will take hours to pump using an tyre air compressor!  No matter how fancy!


The Oztrail Tyre Air Compressor is a great unit, it moves 160 litres per minute which is great for a tyre compressor, but not great when it comes to high volume air pumping.
The problem with an tyre air compressor is that it's designed to provide high pressure, but it does not need to move much air volume.  Your typical tyre air compressor will shift around 70 - 100 litres of air per minute.

Where your inexpensive, high volume air pump will shift anywhere from 250 litres up to 500 per minute.  This makes a huge difference if you're trying to pump up air beds for the whole family!

The best thing is that these pumps are not just great for making your bed, but for inflatable tubes to use in the pool, or boat.  Best of all, they're very inexpensive.  We have units starting at around $20 that will do the job nicely.

The Kookaburra 12v High Volume Air Pump shifts a huge 500 litres of air per minute.  Making pumping up air beds a breeze!  

Interested in buying a High Volume Air Pump?  See our range in store, or by visiting here.